Today isn’t just another day. Today I will create something beautiful.- Unknown
Author: ashleyjunaid
DIY Dry Erase Board/Cork Board
Hello everyone! I’ve been looking for cute message boards to put near my door and just haven’t found the perfect one with everything I’m looking for. I want to be able to write notes, pin receipts or other important papers, and even a place that could hold my keys all while not looking like a wall of a cubicle. I guess I was asking too much! So I decided I could make one and decorate however I wanted to. The steps are pretty easy, it only took about 30 minutes, and how you decorate it is pretty much up to you.
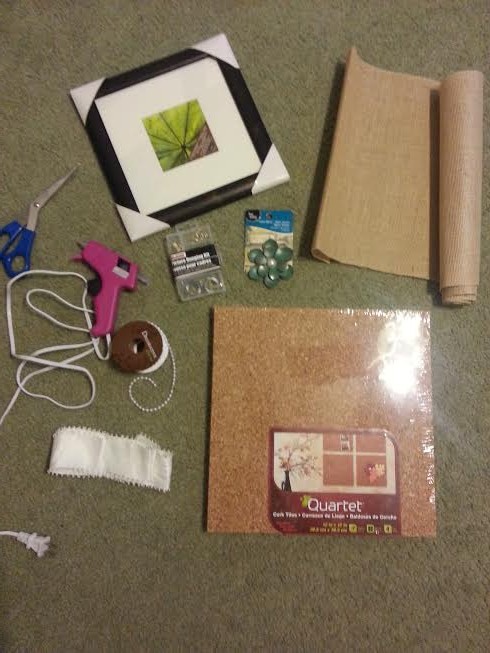
Things you’ll need:
- A picture frame (any size you want. I used a 10X10 frame)
- Burlap roll
- Cork board, not framed and no backing
- picture framing kit if your frame doesn’t come with one
- metal hooks
- glue gun
- scissors
- any decorations (I found a metal flower and strand of pearls)

Take the frame apart and trace frame backing onto the roll of burlap. Then cut piece out. You can use whatever you would like to decorate backing. If you use scrapbook paper I wouldn’t suggest to get a pattern that is too busy. You’ll be writing on the glass. If the background is too hectic, you might have a hard time reading your notes. Also, you could simply paint the back. It’s totally up to you. I just love burlap!

Take your piece of burlap and hot glue it to the frame backing. BE CAREFUL! If you’re using burlap, it will seep through. Just be careful not to burn yourself. Put your frame back together. Be sure to Windex your glass if you got any fingerprints on it like I did.

Next you need to measure your cork board. I cut mine 10×6. You’ll need to adjust your width according to the size of your frame. Hot glue the cork board to the bottom on your frame.

If you want a place to hang your keys like I did, add hooks to the bottom edge of your cork board. These are hooks from the picture hanging kit. It included way more than I actually needed to hang the frame. I hot glued them to the back.

The last step is to decorate your frame. This step is of course optional. I kept my decorations pretty simple. I found this metal flower in the jewelry making section. It’s actually a pendant but I took the o ring off the top and added some pearls. Then I glued it to the top left corner. You could use ribbon to make a bow. Really anything to match your decor.
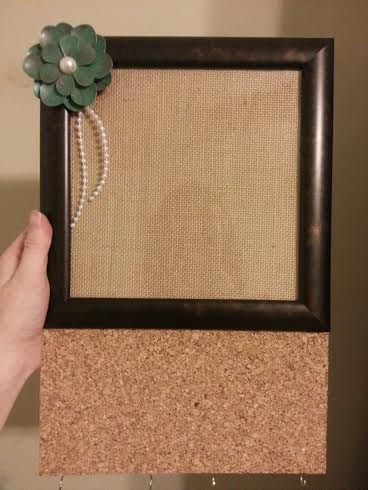
Install your pieces to hang the frame and viola! You’re finished! Now you have a dry erase board, cork board, and hooks to hang things. I know mine will come in handy and hope yours does too!!
How to Keep Your Hair Color From Fading so Fast
For all of you who know me personally, know that I love to color my hair. Each time you see me I will have probably changed it in some way or another. The real reason for this is because hair color fades so fast. (NO! It’s not because I can’t make up my mind or that I that I don’t appreciate my red hair!) It’s called permanent but it’s far from it. So if you’re like me and either don’t have time to be at the salon once a month or you’re just to cheap too do so, here are some tricks I have tried that seem to help. Let me know if you have any to add!
First thing is to take care of it.
At first I thought color safe shampoos and conditioners were just a way to up sell the price of shampoo. But the fact is that it really does help your hair color from fading. It contains color pigments that redeposits color into your hair shaft that will help to keep the color brighter. Shampoos for blonde hair contains colors that will help offset the brassiness that can come with bleached hair. You can get the color safe shampoos from the salon or drug store. This Nutrient Color Safe Nourishing Shampoo is from Sally’s Beauty Supply for $13.50. Promise guys, it’s worth it!
Next thing you can do is don’t wash it everyday.
Now I know this can sound scary and no I’m not saying skip your shower, but I am telling you to skip the daily wash. Washing your hair too often will not only strip the color from it but it also strips the natural oils your scalp produces to keep it healthy. My hair is very oily. When I skip a wash my hair does not look at its best. I found it’s easy to use a dry shampoo. And frankly it will take a lot less time to get ready in the morning. It actually works to keep your hair looking clean and doesn’t damage or fade your hair color. You don’t have to buy the really expensive kind. Suave makes this for $4.00.
Remember that sun is bad for your hair color too.
The sun is frying your hair and you may not be aware of it. Guess what? It’s damaging your color too. This UV protectant will help to strengthen your hair and keep it away from sun damage. It’s also great for your scalp to keep it from burning where the hair is parted. This is a lightweight oil that you spray directly on your scalp then brush through. This Redken bottle is $16.00 and last a long time. It doesn’t take much.
Give your hair a little color glaze. 
Glaze is not only for doughnuts anymore. When your hair color is starting to look a little dull, give it a little color glaze. It revives the color and adds a glossy shine once your hair is dried. It’s an easy process that you can do right in your shower. After you condition, apply the gel formula right to your hair. It’s that easy. John Frieda makes this for $4.00 and can be found at most drugstores.
It’s best to do a deep condition before you color your hair. 
When it is time to get back into the salon be sure to prep your hair first. You want to protect your hair before you color so that it always looks its best. The night before you color use a deep conditioner like this one. It only takes 3 minutes and it’s worth it. Don’t be afraid of oily hair at your appointment. Truth is, it helps the color mix better with your hair. Garnier Fructis make this Sleek and Shine Fortifying 3 minute Masque for $5.99.
So ladies until the guys in white lab coats come up with a way to make fade proof color, hopefully these things will help. Shine on hair, shine on!
DIY Lip Balm
Hello everyone! With Christmas just around the corner, I’m still looking for those easy, DIY gifts! This week I was thinking for things I could put in a stocking. Stockings in our family are probably my favorite part. We take a lot of pride in our stocking stuffers!! I will be making the stockings this year from you guessed it! My favorite….. burlap! Hopefully, I can put the directions up for that in a couple of days.
But for today I found some really cool DIY Lip Balm. With this cool weather, my lips are always getting chapped. Yours may be too. So this batch makes 9 containers of lip balm. Who says you can’t keep one for yourself? And you can honestly say, “Yes, of course I’ve tried it! It’s wonderful!”
Things you’ll need:
- 2 Tbsp beeswax (about 1 oz)
- 2 Tbsp coconut oil
- 2 Tablespoons shea butter
- 9 lip balm containers
- honey
- vitamin E
- medicine dropper
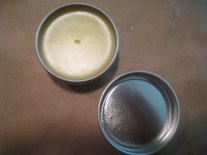
I was able to find most of the ingredients at the grocery store. The beeswax and metal containers, I found at Michael’s Craft Store. (Have I mentioned how much I love this place?)
Directions:
1. Melt beeswax in a small pan or crock pot over low heat. Add coconut oil and shea butter until all ingredients a melted. Add a few drops essential oil if desired. I did not use any and it had a natural honey smell.
2. Using a small medicine dropper, pour the melted liquid into your lip balm containers. Add a few extra drops to the top after filling each container as the ingredients will shrink as they cool.
3. Let balm completely cool and harden.
I was thinking of ways to decorate the containers. You could tie a ribbon and bow around the top. Just be sure to add a dot of glue to keep it in place. I love monograms. If you have a steady hand, you could use Tulip paint to put the recipients monogram on top. Be sure to buy the larger size if that’s your plan. Or if your computer savvy, which I am not, you could make labels. There are some great label templates out there that you can download for free. Michael’s carries the sticker labels if you decide to go this route.
Either way, this was pretty easy and not too expensive. Some of the ingredients you may already have on hand. I always have coconut oil in the house! I’m excited about this one. It’s the perfect stocking stuffer!
Recipe found at http://www.passionatehomemaking.com
If you’re from the south, it’s called Nanner Puddin’!
Hello everyone! With my little one being due anytime now, I thought I’d get in the kitchen and go out with a bang! I hope to be that mom in the kitchen with my baby strapped to my chest, but who knows?? My husband has been talking about banana pudding for weeks now. So I thought it’d be a great thing to make before I’m too exhausted to do so.
The recipe is from my momma (which I think came from her momma!). You can follow her blog at dtaylor689.wordpress.com. It was very simple to make. I only used two bowls and a couple of spoons so not a lot of mess, and it didn’t take a lot of time. In about 30 minutes it was finished. I probably would have been finished sooner if I had not taken breaks to “lick the bowl!” Hey, cut me some slack. I am 9 months pregnant! 🙂
Ingredients that you’ll need:
- Vanilla wafers
- 3-4 ripe bananas, sliced
- one-pint heavy whipping cream, whipped
- 1 large box of vanilla instant pudding
- 1 small box of banana instant pudding
- 4 1/2 cups of milk
- 1 14oz can of sweetened condensed milk
- container of cool whip (leave out of the fridge while preparing pudding)
If you remember, I have an army to feed. If your family is “normal” size, you may want to leave out the small box of pudding. In that case, you can choose vanilla or banana. Whichever you like! Also, my momma puts meringue on hers but in the spirit of keeping it simple, I used cool whip for the topping. Again, it’s whichever you prefer. Now lets get started!

In one bowl, whip the heavy whipping cream until soft peaks begin to form. And don’t give up! I thought this would never happen. In another bowl, prepare your pudding. Follow the instructions on the box. For the kind I bought, it required 5 cups of cold milk for both boxes combined. I replaced some of the milk with the sweetened condensed milk. This is what gives it its richness! The measurements for my batch turned out to be 1/2 cup sweetened condensed milk, or about a can, and 4 1/2 cups of milk. Whisk for about 2 minutes and let set for another 5.
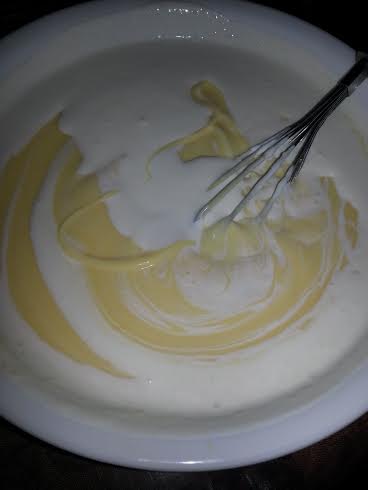
Next, fold your whipped cream into your pudding and whisk until blended together.

Next you’ll want to start layering the goodies. First, line the bottom of your bowl with wafers. Now I had to control my OCD on this one but remember, it’s about keeping it simple. They don’t all have to be facing the same way. You won’t taste a difference, I promise! Then add your banana slices. Next, spread the pudding mixture. I had enough to do this twice.

To finish it off, I added a top layer of cool whip. If you leave it out for a bit, it will make it very easy to spread. Cold cool whip…. not so much. I learned that the hard way! So to take out my aggressions, I crumbled a few wafers in a zip lock baggie. (I felt much better after that). I sprinkled them on just for added presentation.
Well guys, that’s it. The hardest part is letting it chill for a bit. I wanted it now but it taste better when the bananas and wafers mush from the pudding………. ENJOY!
DIY Dear Santa Frame for the Kiddos
Hello Ladies! As all of you know, I am the queen of simple, cheap, and things that don’t consume your time. So when I saw this project at my Michaels Craft Store, I had to share! I love the holidays and so excited to get decorating. This project is perfect for the kiddos to help so put down some newspaper to catch the mess and lets get started!!

Things you’ll need: (of course I found everything at Michael’s)
- laser cut wooden frame
- chalkboard paint
- red acrylic paint
- paint brush (doesn’t have to be fancy)
- red glitter
- frame backing
- double sided tape
- ornament of choice (optional)
 Instructions:
- Paint your frame red and while it’s still wet, sprinkle glitter. Let dry. If you see any spots that was missed just add a dab of paint and add more glitter. Shake excess off. (This is why you’ll want to prep your area with newspaper. It’ll just be easier clean up!)
- Paint frame backing with the chalkboard paint and let dry.
- Tape backing to frame.
- If you chose an ornament, hang it from the bottom of frame. They typically have string or a hook already attached.
Guess what guys? That’s it. So easy your little one can do most of it themselves. It can be used as a Christmas Countdown or a Dear Santa to leave with milk and cookies. The great thing about chalkboards, is it can be used over and over.
Crock Pot Challenge Day 1: Spaghetti
 Hello everyone! I recently decided to take a challenge. A “Crock Pot Adventure” if you will. I wanted to see if it was possible to feed my huge and GROWING family, without taking hours in the kitchen. Who has time for that? I found several recipes and tried them out. Over the next couple of weeks I want to share with you guys what I found. Hopefully you will be able to utilize some of these and keep yourself out of the kitchen as well.
First up is Crock Pot Spaghetti. Spaghetti is not very hard to make but does take time out of your day. I found it very easy to put all the ingredients in and head to class. When I came home, it was like magic! Dinner was done. And I do like this recipe. It puts a different spin on it as well.
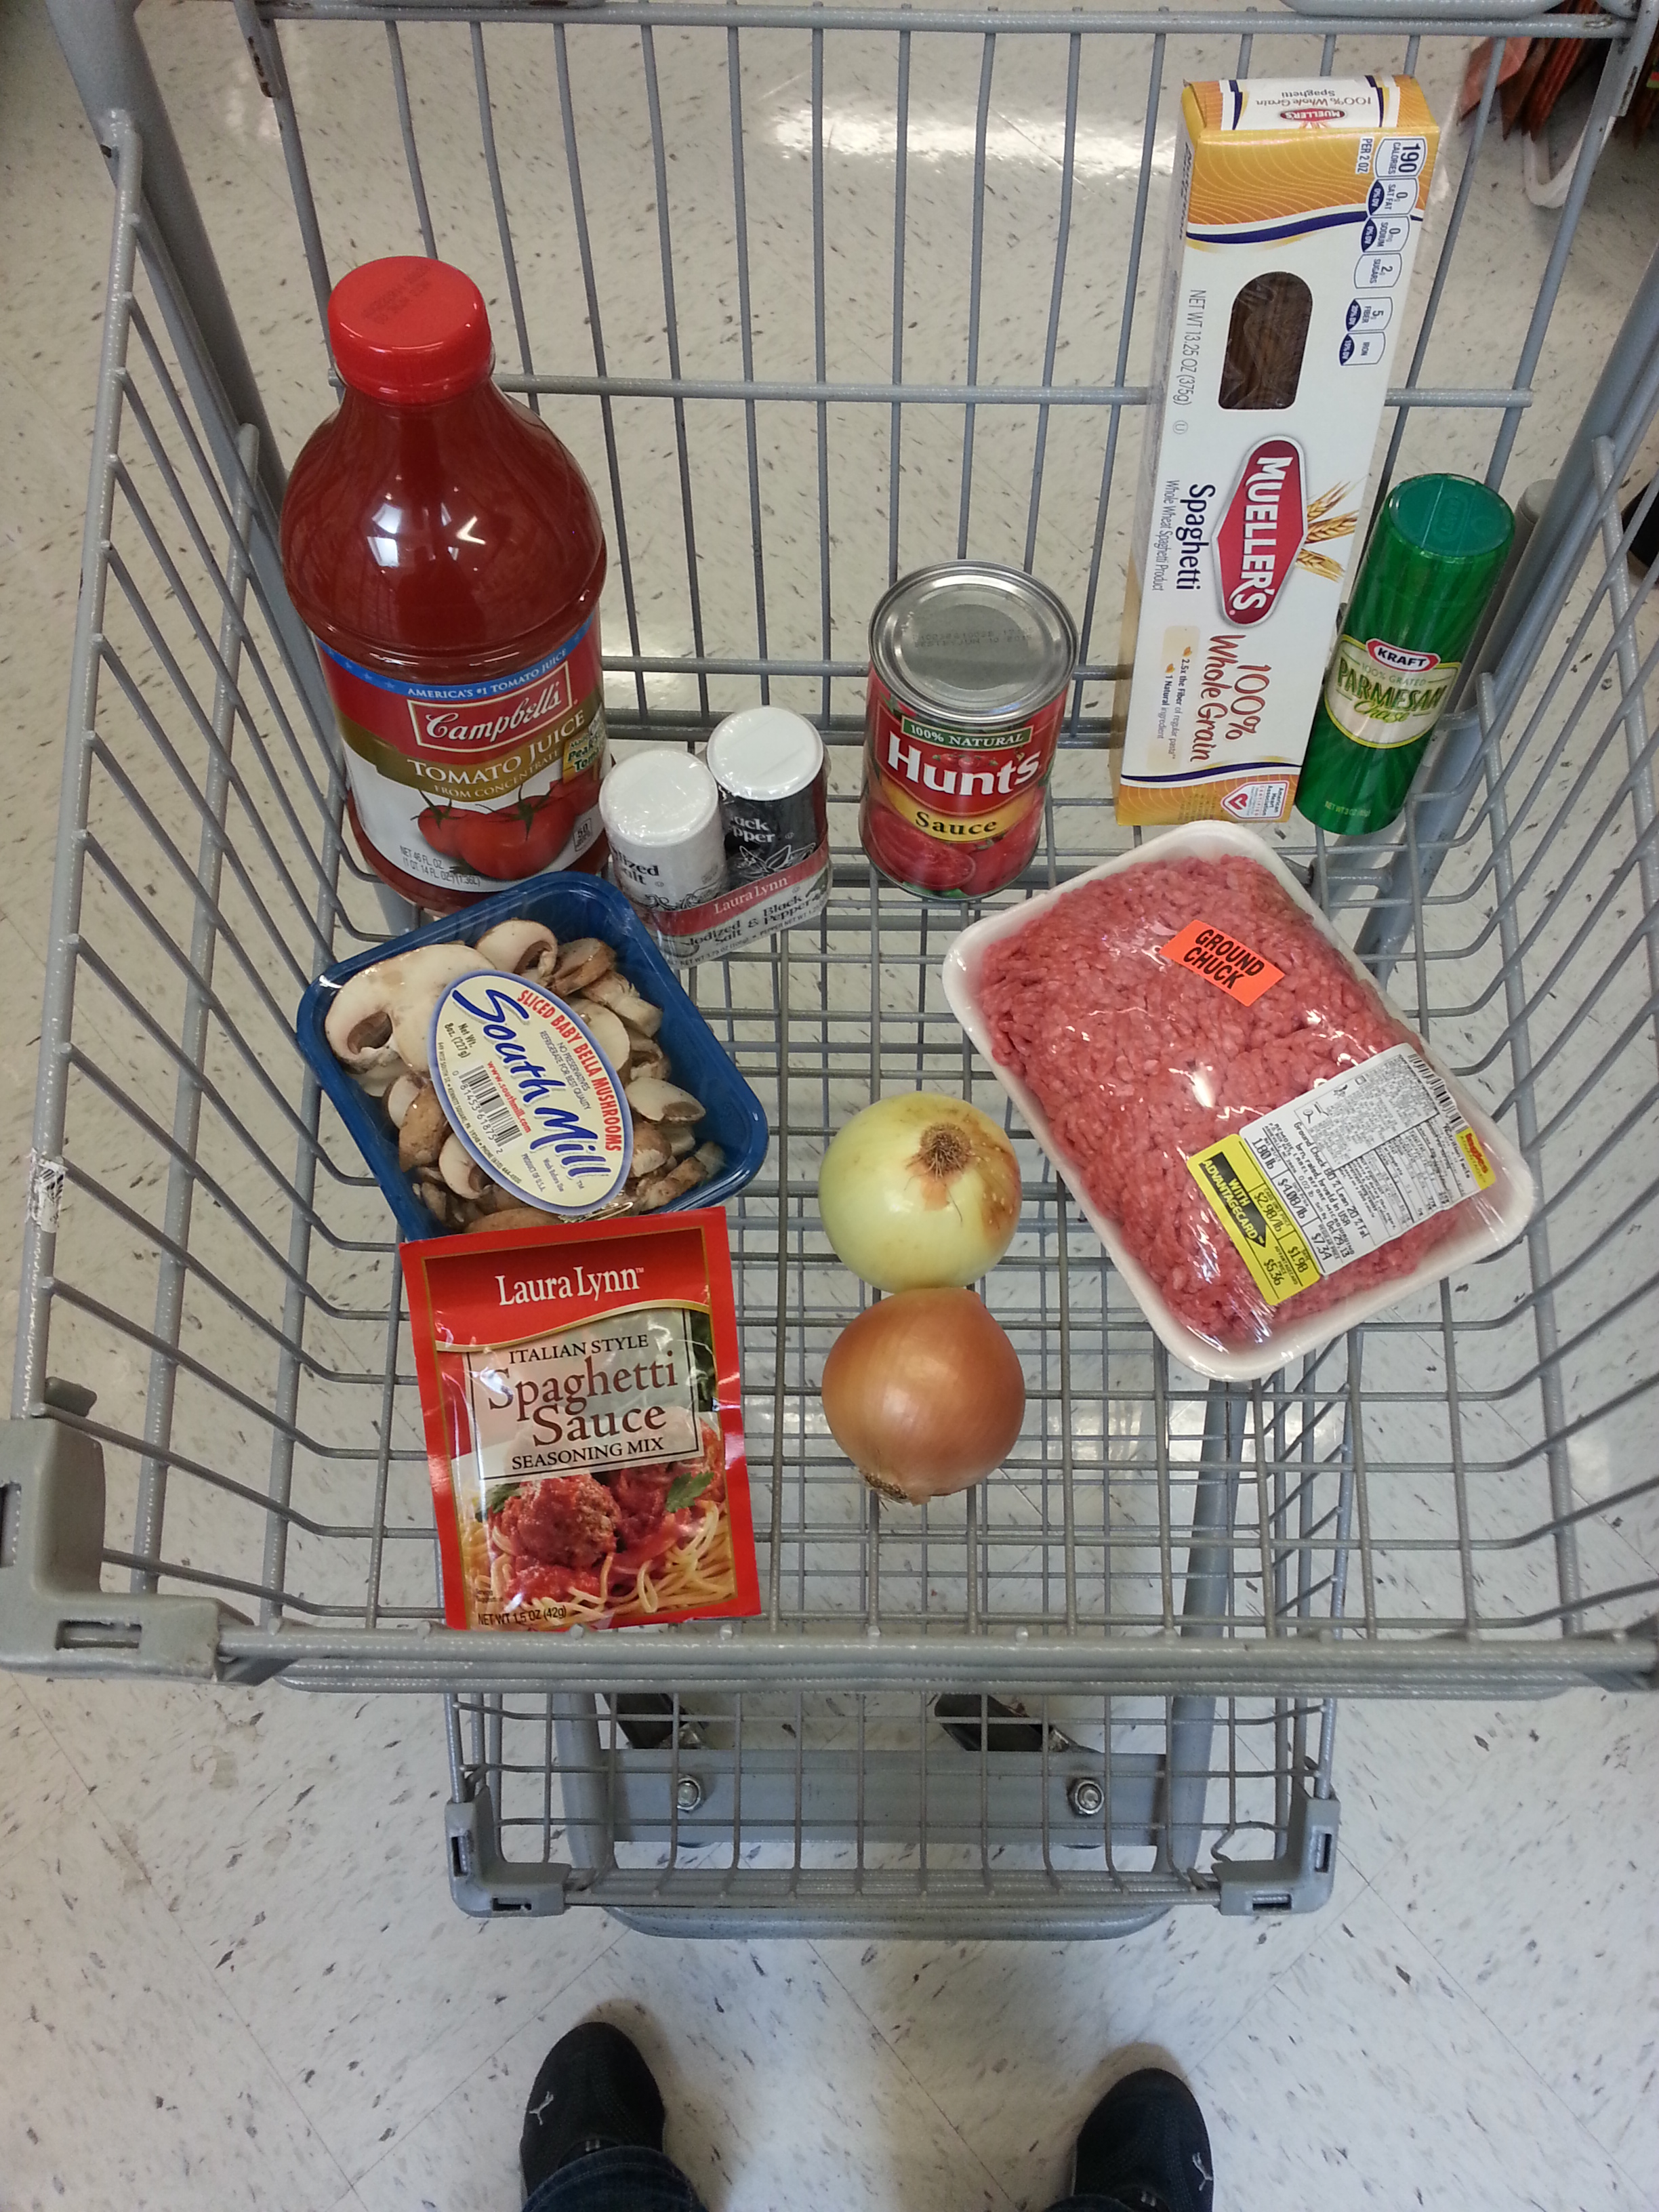
I shopped at my local Ingles Supermarket and was able to get everything I needed for $15.39 which for my family is only $1.54 per person!! You can tweak the ingredients by your taste and family size.
Here’s what you need:
2 lbs. browned ground chuck
1 envelope of spaghetti sauce mix
8 oz. can of tomato sauce
4 1/2 cups tomato juice
1 small package of fresh mushrooms
32 oz. box of spaghetti noodles (I like whole wheat pasta)
1 small chopped onion
Parmesan cheese (optional, but my family loves it!)
All you have to do is put all your ingredients into your pot except noodles and cheese. Stir well to mix everything up. Cook on low for 6 hours. Then add your uncooked noodles, and cook for additional hour on high. And viola, dinner is served!
Spaghetti is nothing too fancy but my family loves it. I hope yours will too!
Boots, Boots, and More Boots…. The How to Guide
Fall is already underway and we’re getting very close to winter. As you all know, boots are very popular and look great! Whether you are buying them for function or for fashion, you really need to know what boot shape fits you best. I have prepared a guide to help you look fabulous in your new boots!
 Body type: Petite
If you have a petite body type, which means you are on the shorter side, try wearing an ankle boot with a heel. This will help elongate your legs and give you a few more inches to your stature. (I found these grey beauties online at Solesociety.com for $90)
 Body type: Plus size
If you are a plus sized lady or have a pear shape, you’ll want t stick to a boot that comes just below the knee. I mid calf boots will make your legs look stumpy. And don’t shy away from stiletto. This will draw a thicker ankle into a thinner line. (These black boots are from Macy’s.com for $119)
 Body type: Apple
For all you Red Delicious girls out there, I recommend a wedge boot for you. Apple shape refers to a heavier, round top with slender legs. A great wedge will help to anchor you and add balance to your shape. (These camel color boots are from shoebuy.com for $130)

If you are tall and slim, a flat boot is best for you. Unless you want to be taller, you don’t really need the heel for height. Finding a boot with an adjustable strap at the top might help if you have slimmer calves. Or a slouchy boot like these, can distract from your slim legs and give you some shape to your bottom. (These boots were found on Macy’s.com for $109)
No matter what your body type is or the boot you choose, just be sure to wear them with confidence. A nice pair of boots can be the focal point to your outfit, so be sure to ROCK IT!
DIY Lavender Milk Bath
Alright ladies! I’ve been trying to find more DIY gifts that you can make for your loved ones for the holidays. It’s right around the corner and it’s going to sneak up on us fast! With Thanksgiving next week, you probably are like me and don’t have a lot of time to make things. But I think this is easy and would make a great gift for family, friends, teachers, and that someone who you didn’t really plan on getting anything for. Only 4 ingredients and about 10 minutes of your time. That’s it!
So here it goes…… Lavender Milk Bath
Ingredients:
- 1 c powdered milk
- ¼ c cornstarch
- ¼ c baking soda
- 10 drops essential oil (you can choose whatever scent you like)
Mix all ingredients in a mixing bowl. Add a few drops of oil. Keep in mind that this will be put into a bath and will be diluted. So you don’t have to be too cautious about adding too much. Funnel into your favorite mason jar. Let sit for 24 hours.
If your feeling frisky, decorate the jar. I’m really loving burlap these days. But you can use anything you like. Or in the spirit of keeping it simple, you can just add a ribbon around the top and tie a bow. Ta-Da!
